IMG_6234One of the many fun things about working for ACH Food Companies was being able to “play” in the research & development kitchen.  I just love “inventorizing” recipes for different occasions.  I created this recipe just for my boss at the time, Fulya Eren, and used it not only as a dip but also as a pizza sauce.  If you don’t have a food processor, you can also use a blender.

1 15 ounce can garbanzo or cannellini beans, drained & rinsed
½ lemon, freshly squeezed, or 1 tablespoon lemon juice
1/3 cup tahini
2 cloves fresh garlic
1 7 ounce jar roasted red peppers, drained
½ tsp. salt
½ tsp. lemon pepper
½ tsp. ground cumin
2 tablespoon extra virgin olive oil

roasted-red-pepper-hummus-step4-srgb.

Place all ingredients in bowl of a food processor, blend until well combined, about 1-2 minutes. Serve with crackers, chips or with fresh vegetables.

IMG_0433.jpg

One of my favorite appetizers is  Caprese Salad Skewers.  These delightful little gems are so easy to make and so yummy to eat.

1 large container of Marinated Cilegine Salad, or Cilegine Mozzarella
1 large container of Cherry Tomatoes
Fresh Basil
Salt & Pepper
Balsamic Glaze (can be purchased in grocery store)
Skewers

Skewer with one mozzarella ball and one cherry tomato. Repeat with remaining cheese and tomatoes. Place skewers on a serving platter, drizzle with balsamic glaze, chopped fresh basil, salt & pepper.

Bon Appetito!


Roasted Red Pepper Hummus & Caprese Skewers


“Eat More Chicken”…..so who doesn’t these days????  This recipe is not only quick and easy to make but moist and delicious.  Prepare some rice (Near East Rice Pilaf is our favorite), a salad or veggie and you have a healthy meal in under 60 minutes.

First you will want to “pound your chicken” out, to about ½” thickness.  There are several ways to do this, some people like to use a plastic zip lock bag, my preferred method is to place the chicken on a cutting board, put a piece of parchment paper (or plastic wrap) over the chicken and then use a meat mallet to pound the chicken.  Don’t have a meat mallet?  No problem, the back of a small sauce pan works just as good.

Then you will need three bowls, dry (flour), wet (egg mixture), and dry (breadcrumb cheese mixture).  This is known as 3-piece breading.img_5819

After you have breaded the chicken, place on a plate and refrigerator 30 minutes.img_5822

Preheat oven to 375°F.  Add butter to a baking pan, place in preheated oven until butter is melted.img_5825

Remove pan from oven and add the prepared chicken breasts.

This slideshow requires JavaScript.

Bake according the recipe directions turning the chicken half way through the cooking time.img_5827

Place chicken on a clean cutting board, let rest 5 minutes covered, slice thinly and serve.  If you would like a little sauce on this, while the chicken is resting, scrap the pan drippings into a small sauce pan and cook over medium heat.   Add ¼ cup white wine or chicken stock and bring to a boil, spoon over sliced chicken.  img_5828

Oven Baked Cheddar Chicken
Prep time: 15 minutes
Rest time: 30 minutes
Bake time: 20-25 minutes
Serves 3-4

2 skinless, boneless chicken breasts
½ cup all-purpose flour
½ teaspoon garlic salt
¼ teaspoon garlic pepper
1 egg
1 tablespoon Franks Hot Buffalo Wing Sauce, optional
1 tablespoon milk
¼ cup Italian seasoned bread crumbs
¼ cup panko bread crumbs
1 cup sharp shredded Cheddar cheese
Pound chicken breasts to a ½” thickness (http://www.wikihow.com/Pound-Chicken-Into-Cutlets).

In a bowl, mix flour, garlic salt, and garlic pepper. In a separate bowl, beat together the egg, hot sauce (optional), and milk. In a third bowl, mix the bread crumbs, pankos, and cheddar cheese. Dredge chicken pieces in the flour mixture, dip in the egg mixture, then press into the breadcrumb mixture. Place prepared chicken on a large plate. Continue with remaining breasts. Cover chicken with plastic wrap and refrigerator 30 minutes (this prevents coating from falling off).

Preheat oven to 375°F. Coat a baking dish with ¼ cup butter. Place dish in the preheated oven until butter is melted. Remove from oven and add prepared chicken breasts into the dish. Bake 15 minutes, remove from oven and flip chicken pieces over. Place back into the oven and bake until chicken temperature reaches 160°F, about another 15-20 minutes. Remove chicken from oven and let rest 5 minutes before serving.

Buon Appetito!

Easy Baked Cheddar Chicken


Did I ever say “I love my job”?  Heck yes!  Honestly, it’s the best job anyone who loves to cook could ever have…..Part of my job (along with my team) is formulating baking mixes for the home cook.  Our latest project to hit the grocery shelves is Fleishmann’s® Simply Homemade® Muffin & Bread Mixes:
img_5044These amazingly yummy mixes arrived at your favorite grocery store in July.  If you haven’t tried them yet, by all means, add the mixes to your grocery shopping list (especially the Double Chocolate).

In addition to creating mixes my job also entails creating recipes to go along with the newly “inventorized” mixes.  Okay, so this might really be my favorite part, I get to use my imagination and “think outside the box” (ha,ha) when it comes to inventing recipes.

I usually investigate what the “cooking/baking” trend is before I work on this part so that my recipes will be aligned with what’s cookin!  The hottest thing right now in cakes are “crepe cakes”.  These are so extremely yummy and not as filling and sweet as cakes are.  Also, best made a day in advance, but not necessary.

Below is my recipe for Lemon Poppy Seed Crepe cake, I added a little blueberry sauce for color and another flavor profile.  The basic crepe cake and filling recipe can be used for any of the muffin & bread mixes, pictures below:

If you have never made crepes before, you really need to try this, it is very easy (heck, even my non-cooking boss has made these).  The only drawback is time, takes about 30 minutes to actually make the crepes.  For the Triple Chocolate Crepe Cake, I used white chocolate pudding & pie filling, for banana, banana flavored pudding & pie filling, you can change these up and make up your own recipe, how about Double Chocolate Crepe Cake with pistachio pudding & pie filling????  You are only limited by your own imagination!

Lemon Poppy Seed Blueberry Crepe Cake

Yields: 20-24 8 or 9-inch crepes, enough for one cake
Prep time: 10 minutes
Rest time: 30 minutes
Cook time: 40 minutes

Crepes:
1 package Fleishmann’s® Simply Homemade® Lemon Poppy Seed Muffin & Bread Mix
1 ½ cup milk
4 eggs
2 tablespoons butter, melted
1-2 tablespoons butter, for cooking crepes

Lemon Cream Filling:
1 3.4 ounce Instant Lemon Pudding & Pie Filling
1 cup milk
1 cup heavy whipping cream

Blueberry Sauce:
2/3 cup fresh blueberries
1 tablespoon honey
1 teaspoon cornstarch

Topping:
1 cup heavy whipping cream
1 tablespoon powdered sugar
In a blender or bowl of a food processor, combine all of the ingredients for crepes and pulse for 10-20 seconds. Place the crepe batter in the refrigerator for 30 minutes. This allows the bubbles to subside so the crepes will be less likely to tear during cooking. The batter will keep for up to 48 hours.
Lightly butter an 8 or 9-inch skillet over medium heat. Using a one-ounce ladle (or 2 tablespoons) pour batter into prepared pan, rotating pan until batter covers bottom. When the crepe has browned slightly on the bottom, carefully work a rubber spatula underneath it and flip. Cook the second side briefly, just to set the batter. Place cooked crepe on a sheet pan lined with parchment paper. Repeat with remaining batter.

Combine pudding mix, heavy cream and milk into a large bowl, using a hand mixer whip until creamy. Refrigerate until ready to assemble the cake.

In a small pan combine all blueberry sauce ingredients and heat over medium heat until slightly thick. Remove from heat until needed.

To make the topping, place the sugar into the mixing bowl and add the whipping cream. Whisk just until the cream reaches stiff peaks. Keep refrigerated until ready to use.

To assemble the cake, layer 2 crepes with 2-3 tablespoons of filling, spreading across surface of crepe to within 1 inch of edge. Drizzle blueberry sauce over cream. Repeat until all crepes have been used. Top with piped whipped cream, fresh blueberries and lemon peel (if desired).

img_5059


Lemon Poppy Seed/Blueberry Crepe Cake


It’s that time of the year again, time to attack all that great basil and tomatoes from your vegetable garden (or your favorite vegetable stand).  Below are two of my favorites.  The 1st is what I call “Pesto Butter”.  This little bundle of deliciousness goes with so many great dishes, sauces, breads, etc.  You are only limited by your imagination when it comes to this butter…..the other is my oven roasted tomato sauce.  My friend Amy always provides me a nice sample of tomatoes from her very large garden.  Usually I have already “canned” my tomatoes, so I have found that the oven roasting is perfect, delicious and ohhhh so easy!

Pesto Butter:

1-2 cups fresh basil removed from stems
3-4 cloves garlic
2-3 stick of butter (no margarine ever!), softened

Place your basil in a salad spinner, run under cold water and spin to dry.IMG_5501  In the bowl of a food process add 3-4 (more or less if desired) cloves garlic.  IMG_5502

Process until garlic is chopped.    IMG_5503Add basil leaves and continue to process until basil is chopped.  Scrape down the bowl with a rubber spatula, add softened butter (2 sticks) and continue to process until smooth.  IMG_5504If the color is too green, add another stick of butter and repeat.  IMG_5506Using a small scoop, scoop pesto butter onto a sheet pan lined with parchment paper (easy clean up).  IMG_5508

Place pan of pesto butter into the freezer.  Come back an hour later (or more), remove frozen butter and place into a zip lock bag.  Return butter to your freezer and use as desired…..will freeze for 12 months.

Oven Roasted Tomato Sauce

5-8 lbs fresh tomatoes, quartered, cored and seeded
2-3 teaspoons salt
1-2 teaspoons black pepper
¼-½ teaspoons chipotle peppers (optional)
¼ cup extra virgin olive oil
1 bunch fresh herbs, thyme, rosemary, oregano, basil (or 1 teaspoon of each dried)
3-4 cloves garlic, sliced

Preheat oven to 225°F.

Combine all ingredients in a large mixing bowl, toss gently to coat.  Place tomatoes in a 9×13″ baking dish.  Roast 2 hours or until tomatoes are slightly browned and soft.

Ingredients in Oven RoastedIngredients in Oven Roasted

Cool tomato sauce, place in a zip lock bag and freeze for future use.  Use for spaghetti, over fish, pizza, bruschetta…..YUM!!!!

Buon Appetito!!!!!

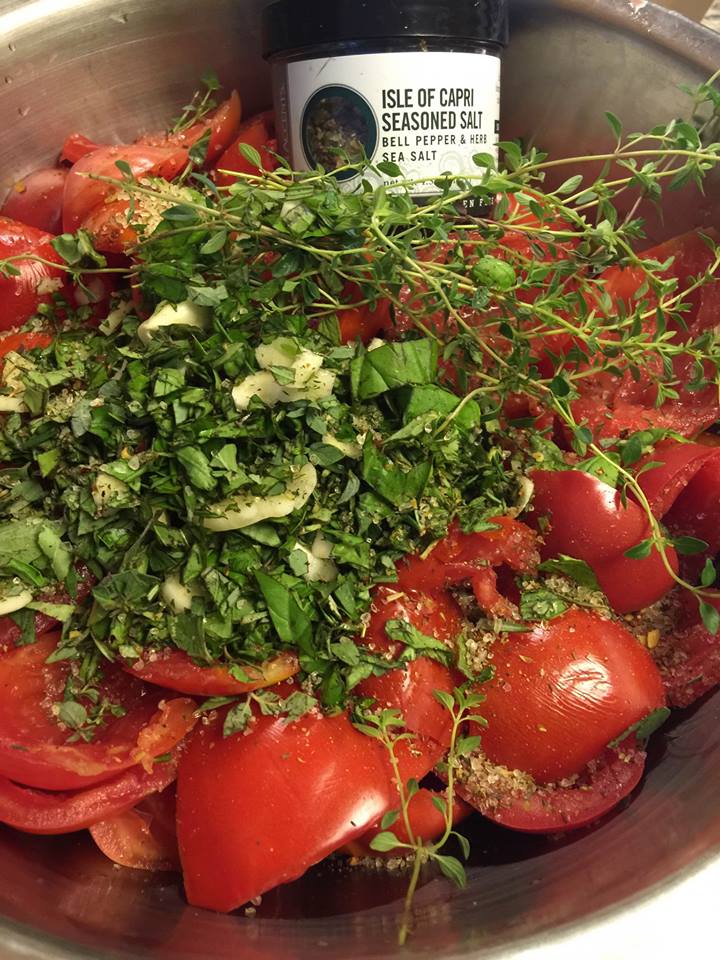
Pesto Butter, Oven Roasted Tomato Sauce


One of my favorite Italian dishes to make is Gnocchi, also known as “little dumplings”.    Typically these are made with potatoes, semolina or flour, eggs, and served with a sauce.  I prefer the lighter ricotta version.  I have to say, these are SO easy to make, you only need 30 minutes and you will have an amazing dinner for your family and friends.  I sometimes make these with spinach and sometimes not.  My recipe and photos are for both.  I hope you enjoy!

You will need 16 ounces of whole milk ricotta, 2 eggs, 1 ½ tablespoon extra virgin olive oil, ½ cup grated parmesan cheese, 1 teaspoon kosher salt, ½ teaspoon white pepper and 1 cup of cooked chopped spinach (all the water must be removed).

DSC_0003It helps to have a gnocchi board, you can purchase one on Amazon for about $5.00.

IMG_4659

Bring a large pot of salted water to a boil.
Combine the ricotta cheese, Parmesan, olive oil, eggs, spinach (if desired) salt, and pepper with a wooden spoon in a large mixing bowl. Add the all-purpose flour in 3 parts, stirring after each addition.  You want the dough to be slightly sticky, add more flour if needed.
Bring the dough together in a ball and cut off one-quarter of it. Dust the work surface with all-purpose flour to prevent sticking, and roll the cut-off piece of dough into a dowel shape about 5/8 inch in diameter. Cut the dowel into 5/8-inch pieces. Dust some parchment paper with polenta or corn meal.  Roll each dumpling on the gnocchi board.

This slideshow requires JavaScript.

Place the gnocchi on the prepared sheet pan.  Repeat with the rest of the dough, quarter by quarter.


Place the prepared gnocchi in the refrigerator until ready to use.

To make the Pancetta Cream Sauce, you will need 1 6 ounce package pancetta, 2 tablespoons oil, 1 tablespoon butter, 1 shallot chopped, 2 gloves garlic, minced,  ¼ teaspoon red pepper flakes (if desired) 1 14.5 ounce can Red Gold Petite Diced Tomatoes, ½ cup heavy whipping cream.

Heat a large saute pan over medium-high heat. Add the pancetta and cook until the fat has rendered and the pancetta is crisp, about 5 minutes.

IMG_5208Remove the pancetta from the pan and reserve, leaving the fat behind.
Add the oil, butter, diced shallots and garlic to the hot pan and season with salt and pepper. Cook until the shallots have softened, about 5 minutes.  IMG_5209

Add the can tomatoes, cover and bring to a simmer. Cook for 20-25 minutes.  Add the reserved pancetta and heavy cream,  cook an additional 2-3 minutes (or until the cream is hot).

Cook the gnocchi in the boiling water for 2 minutes. Serve tossed with a bit of the Pancetta Tomato Sauce, top with chopped basil and freshly grated Romano cheese.  Alternatively, you can freeze the uncooked gnocchi for up to 2 weeks.

This slideshow requires JavaScript.

Ricotta/Spinach Gnocchi:
2 cups whole milk ricotta cheese
1/2 cup grated Parmesan
1 1/2 tablespoons extra-virgin olive oil
2 large eggs
1 1/4 – 1 ½ cups all-purpose flour, plus more for dusting
1 cup cooked chopped spinach, squeezed dry (if desired)
1 teaspoon kosher salt
½ teaspoon white pepper

Pancetta Cream Sauce:
6 ounces thick-cut pancetta (about 3 1/4-inch slices), diced
2 tablespoons extra virgin olive oil
1 tablespoon butter
1 shallot, diced
2 cloves garlic, minced
salt & pepper to taste
¼ teaspoon red pepper flakes
One 14.5 ounce can Red Gold Petite Diced Tomatoes
½ cup heavy whipping cream
4-5 fresh basil leaves, cut into chiffonade

Combine the ricotta cheese, Parmesan, olive oil, eggs, spinach (if desired) salt, and pepper with a wooden spoon in a large mixing bowl. Add the all-purpose flour in 3 parts, stirring with after each addition.  You want the dough to be slightly sticky, add more flour if needed.

Bring the dough together in a ball and cut off one-quarter of it. Dust the work surface with all-purpose flour to prevent sticking, and roll the cut-off piece of dough into a dowel shape about 5/8 inch in diameter. Cut the dowel into 5/8-inch pieces. Dust some parchment paper with polenta or corn meal.  Roll each dumpling on the gnocchi board. Place the gnocchi on the prepared sheet pan.  Repeat with the rest of the dough, quarter by quarter.Place the prepared gnocchi in the refrigerator until ready to use.

To make the Pancetta Cream Sauce, heat a large saute pan over medium-high heat. Add the pancetta and cook until the fat has rendered and the pancetta is crisp, about 5 minutes. Remove the pancetta from the pan and reserve, leaving the fat behind.
Add the oil, butter, diced shallots and garlic to the hot pan and season with salt and pepper. Cook until the shallots have softened, about 5 minutes. Add the can tomatoes, cover and bring to a simmer. Cook for 20-25 minutes.  Add the reserved pancetta and heavy cream,  cook an additional 2-3 minutes (or until the cream is hot).

Cook the gnocchi in the boiling water for 2 minutes. Serve tossed with a bit of the Pancetta Tomato Sauce chopped basil and freshly grated Romano Cheese.   You can freeze the uncooked gnocchi for up to 2 weeks.

Buon Appetito!

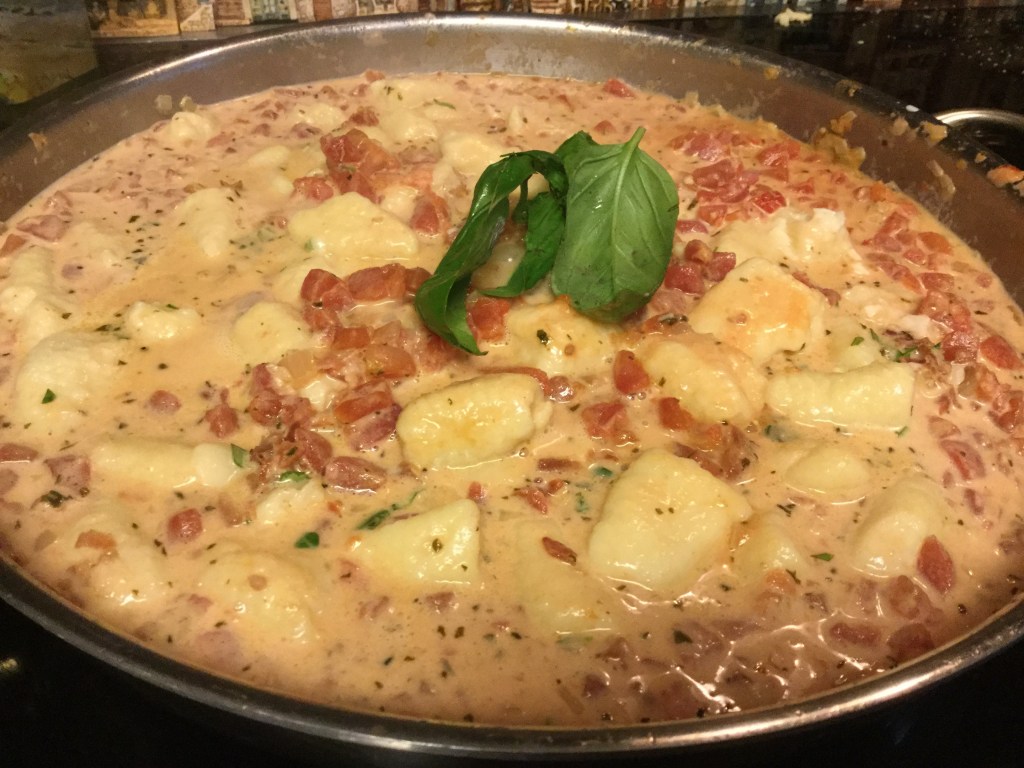
Ricotta/Spinach Gnocchi with Pancetta Tomato Cream Sauce


This past Christmas I purchased an Anova Precision Cooker for my son, Rob, who loves to cook.  He was very skeptical when he opened the box and asked “what is it”?  Well, just what exactly is a precision cooker you might ask…..it’s an immersion circulator that is used to cook sous vide….and what is sous vide cooking?

Sous vide” is French for “under vacuum” and refers to the process of vacuum-sealing food and cooking it in a temperature controlled water bath. However, that’s a bit of a misnomer. You don’t need to vacuum seal your food to cook sous vide. Instead, this technique is really about bringing food to a very precise temperature and holding it there for a period of time, which is why we refer to the technique as “precision cooking.”

Chefs around the world use sous vide cooking to prepare food to the perfect level of doneness while also retaining its nutrients, but the technique isn’t just limited to high end restaurants. In recent years, affordable countertop sous vide equipment like the Anova Precision Cooker have made sous vide cooking available for home use.

To cook sous vide, first prepare your food of choice — it can be anything from a steak or a chicken breast to corn on the cob — then place it in a plastic vacuum-sealed or zipper lock bag. Attach your immersion circulator to a pot of water and set the desired time and temperature. Clip your sealed bag of food to the pot and let it cook, the circulator moves water around the pot, ensuring a consistent temperature throughout. Once your food has finished cooking, you can sear it, serve it, or even save it for later. It’s simple, convenient, and produces professional quality results every time.” 

It didn’t take Rob very long to perfect the sous vide technique.  He would always call me or text me and tell me how fantastic all the food was that he made with the Anova.  I have to admit,  I was jealous!!!  Here are some pictures of just a few of his creations, burgers, steaks, rack of lamb…..Yum!

This slideshow requires JavaScript.

This past Mother’s Day I posted a link to Anova on Facebook and made a subtle hint about it making a great gift for mom.  WOW…..did it work!  I was so excited when Rob & Cecile sent me the Anova….I couldn’t wait to try it out.  So far I have made burgers, steaks, and boneless beef tips.  All have been wonderful.  I have been itching at the bit to try baby back ribs.  Well, its the bit…..

IMG_5097

THE RUB

Then seal and add to pot:

Now the fun part, turn the Anova cooker on and set the temperature to 145F and the timer on for 20 (YES 20) hours and forget about it…..

20 Hours Later:

Remove the bags of ribs from the pan.  Ribs can be placed in the refrigerator if not ready to use them right away (but take them out and let them come to room temperature before finishing).

IMG_0206

Now comes the really fun part….light the grill (or you can use a grill pan or place the ribs on a sheet pan and place under the broiler).

IMG_0207

Once the charcoal is hot (around 350F) place the ribs on the grill, presentation side down,  for 2-3 minutes, turn the ribs over and baste with your favorite BBQ Sauce (we love Weber Spicy).  Close lid and cook an additional 3-5 minutes.  Remove ribs from grill, serve…

IMG_0203

IMG_0202

Definitely the MOST tender, moist, flavorful ribs I have ever had.  The hint of smoke was perfect, the meat didn’t fall off the bones (that’s a Memphis no-no).  ” Properly cooked ribs will pull cleanly off the bone with your teeth, but they will still have some resilience and chew, like a properly cooked steak, but not be tough.”

Here’s the recipe….enjoy and Buon Appetito!

Sous Vide Baby Back Ribs

The Rub:

2 tablespoons brown sugar
1 tablespoon smoked paprika
1 tablespoon chili powder
1 tablespoon Weber Smokey Mesquite Seasoning
1 teaspoon black pepper
1 teaspoon onion powder
1 teaspoon ground cumin seed
1 teaspoon cayenne pepper (or to taste)
1 teaspoon garlic powder
1 teaspoon mustard powder
1 teaspoon salt
liquid smoke

Mix all dry ingredients together until combined. Sprinkle over both sides of ribs. Set ribs aside for 1 to 2 hours.

Divide ribs into 3 pieces. Place each piece in a zip lock or food saver bag and place a few drops of liquid smoke into each bag. Place sealed bags in preheated water bath for 20 hours, set at 145°F.

Remove ribs from bath. Place on a grill pan, under the broiler, or on a hot grill for 3-5 minutes per side. Baste with your favorite BBQ Sauce, if desired.

Sous Vide Baby Back Ribs


1421138_10207531540021013_894542608347932848_o

This dish easily wins the award for one of the fastest, easiest and most delicious recipes out there.  Total time – 45 minutes, which includes 10 minutes to peel and devein shrimp.  I bet most people have all the ingredients in their cabinet, except the shrimp.  :o)

Prep time:  10-15 minutes
Cook time:  30 minutes

Ingredients:

1 lb. raw shrimp (20-25 count), peeled and deveined
¼ cup olive oil
¼ cup butter
½ onion or 1 shallot, finely diced
4-5 cloves garlic, minced
¼ teaspoon red pepper flakes, or to taste
2 14.5 ounce cans of Red Gold, Petite Diced Tomatoes
1 teaspoon fresh thyme
1 teaspoon fresh basil
Black pepper to taste
¼ cup chicken stock
¼ cup heavy cream
1 lb. capellini, cooked al dente, drained – reserve a few tablespoons of the cooked pasta water*
2 tablespoons fresh chopped parsley
Good quality Romano or Parmigiano-reggiano cheese, shaved or grated

In a large skillet over medium heat, melt the butter and oil.  Add chopped onion (or shallot), garlic and red pepper flakes.  Reduce heat to low and cook until onions are soft and transparent, about 10 minutes.

Add diced tomatoes, fresh thyme, basil, black pepper and chicken stock.  Increase heat to medium low and continue cooking 20-30 minutes.  Add raw shrimp, cook until shrimp turns pink, about 5 minutes.  Add heavy cream and reserved pasta water, simmer 2-3 minutes.

Place cooked pasta in a large serving bowl, pour sauce over pasta and top with fresh chopped parsley and grated cheese.

*Make sure you GENEROUSLY salt the pasta water before cooking your pasta, about 2-3 tablespoons.

Buon Appetito!


Capellini with Tomatoes and Shrimp


According to Wikipedia “November was the ninth month of the ancient Roman calendar. November retained its name (from the Latin novem meaning “nine”) when January and February were added to the Roman calendar. November is a month of spring in the Southern Hemisphere and autumn in the Northern Hemisphere”.  But to me, November means, football games, family holiday gatherings, raking leaves, cooler temperatures, and comfort food.

Wasn’t that long ago that I discovered (I know what you are thinking) spaghetti squash.  I REALLY don’t know why it took me so long either!  Well, this recipe is sure to delight everyone in your family, its the perfect “comfort” food for this time of the year.  And did I say, easy!  What you will need:

1 Spaghetti Squash
1 lb. large (21-25 count) shrimp, peeled and deveined
1 teaspoon butter
1 teaspoon extra virgin olive oil
1 shallot, finely diced
1 clove garlic, minced
1 tablespoon Weber N’Orleans Cajun Seasoning
¼ cup white wine, one that you would also drink :o)
¼ cup chicken stock
⅓ cup heavy cream
1 tablespoon fresh parsley, if desired
1 tablespoon capers, rinsed
1 cup shredded mozzarella
2 tablespoons parmesan cheese

Preheat oven to 400°.  Cut squash in half lengthwise, remove seeds.  Place squash cut side down on a baking sheet.  Roast in the oven for 20-25 minutes, or until tender.  Remove from oven, cool and remove squash using a fork.  You can use the skin as a vessel for the casserole, if desired.

In a large skillet, melt butter and oil over medium heat.  Add chopped shallot, garlic and Cajun Seasoning.  Cook until shallots are transparent, about 5-10 minutes.  Add peeled shrimp and cook until slightly pink, about 2-3 minutes.  Deglaze pan with white wine.  Add chicken stock, heavy cream and capers.  Remove from heat.

Place shredded squash in a casserole dish (or the reserved skins).  Top squash with shallot/cream mixture, add fresh parsley, mozzarella and parmesan cheese.  Bake 10-15 minutes, or until top is golden in color.

Baked Spaghetti Squash Scampi

Baked Spaghetti Squash-Cajun Shrimp Casserole

You will love that one!  Now for the dessert…..

Crust:
2 ½ cups flour
1 cup butter, cut into pieces
½ cup powdered sugar
¼ teaspoon salt

Filling:
4 eggs
1 ½ cups Karo® Light corn Syrup
1 ½ cups sugar
3 tablespoons butter, melted
1 ½ teaspoon Spice Islands® Pure Vanilla Extract
1 teaspoon Spice Islands® Pumpkin Pie Spice
2 ½ cups coarsely chopped pecans
For Crust:
Preheat oven to 350°F. Mix flour, butter, powdered sugar and salt with an electric mixer until mixture resembles coarse crumbs. Press firmly and evenly into a greased baking sheet (15 x 10 inches).

Bake crust 20 minutes, or until golden brown.

For Filling:
Beat eggs, corn syrup, sugar, butter, pumpkin pie spice,  and vanilla in a large bowl until well blended. Stir in pecans.

Pour over hot crust, spread evenly.

Bake 25 minutes at 350°F until filling is firm around the edges and slightly firm in center. Cool completely on wire rack before serving.

Pumpkin Peach Pie Bars

Pumpkin Pecan Pie Bars

Buon Appetito!

Happy November – Baked Spaghetti Squash-Cajun Shrimp Casserole with Pumpkin Pie Pecan Bars for Dessert